Ultimate Guide on How to Connect WiFi Extender to Router: Boost Your Network Coverage
Imagine you’re streaming your favorite show or attending an important video call, and suddenly, your WiFi connection drops, leaving you frustrated. How to connect WiFi extender to router is not just a technical query; it’s a lifeline for uninterrupted internet access. WiFi extenders have become essential tools for overcoming the challenges of weak signals and dead zones, allowing you to enjoy seamless connectivity throughout your home or office. This guide will walk you through the process, ensuring your WiFi reaches every corner.

Understanding WiFi Extenders and Routers
Before we dive into the nitty-gritty of connecting your WiFi extender to your router, it’s crucial to understand the difference between a WiFi extender and a WiFi repeater—two terms often used interchangeably but serving different purposes. A WiFi extender, as the name suggests, extends the reach of your existing WiFi signal, creating a new network from your router. On the other hand, a WiFi repeater simply boosts the existing network by rebroadcasting the signal without creating a new network.
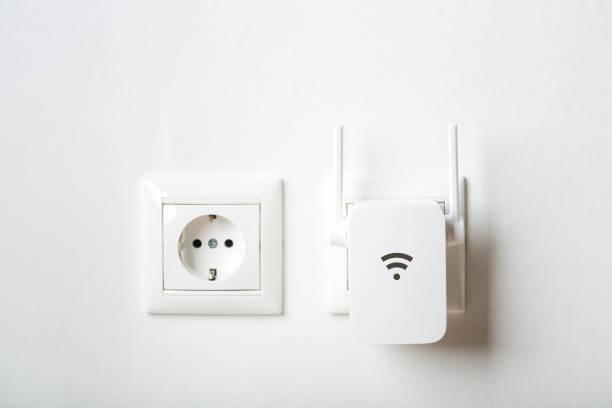
WiFi extenders come in two primary types: Desktop extenders and Plug-in extenders. Desktop extenders resemble small routers and usually offer more features, such as multiple Ethernet ports. Plug-in extenders are compact devices that plug directly into a wall socket, making them more convenient but often with fewer features. Your choice between these types should be guided by your specific needs and available space.
Preparing for Installation
Preparation is key when learning how to connect WiFi extender to router. The first step is to check compatibility between your router and extender. While most modern extenders work with any router, it’s always wise to confirm this to avoid any hiccups during setup. Refer to the extender’s manual or the manufacturer’s website for compatibility details.
The next important factor is location. Your WiFi extender should be placed within the range of your existing router, ideally midway between the router and the area where the signal is weakest. Avoid placing the extender in areas with many obstructions, such as thick walls or large metal objects, as these can interfere with signal strength.
Step-by-Step Guide to Connecting Your WiFi Extender
Initial Setup
Now that you’re ready, let’s get started with the initial setup. Begin by unpacking your WiFi extender and ensuring all components are present. Plug the extender into a power outlet close to your router. This proximity will make the initial connection easier and more reliable.
Once powered up, wait for the extender’s lights to stabilize, usually indicating it’s ready for setup. Some extenders might require you to switch them on, so check the manual if nothing happens initially.
Connecting via WPS
One of the simplest ways to connect your WiFi extender to your router is using the WPS (Wi-Fi Protected Setup) button. This method is hassle-free and doesn’t require you to fiddle with any settings on your computer or smartphone.
Here’s how to do it:
1. Press the WPS button on your router: This button is usually located on the back or side of the router.
2. Within two minutes, press the WPS button on your WiFi extender: The extender will now attempt to connect to your router automatically.
3. Wait for the connection light: After a short while, a light on the extender should indicate a successful connection. If the light is solid, the extender is connected; if it’s blinking or off, try the process again.
This method is quick and ideal if your router supports WPS. However, if your router doesn’t have a WPS button, don’t worry. The manual connection setup is your next best option.
Manual Connection Setup
For those without a WPS option, setting up your WiFi extender manually is still a straightforward process.
1. Access the extender’s network: On your computer or smartphone, go to your WiFi settings and look for the extender’s network name (SSID). It usually appears as something like “NETGEAR_EXT” or “Linksys_Extender.”
2. Connect to the network: Select the extender’s network to connect. There may not be any internet access at this stage, which is normal.
3. Navigate to the setup page: Open a web browser and type in the setup page address, typically something like mywifiext.net for NETGEAR extenders. This address will direct you to the extender’s setup interface.
4. Log in: You may be prompted to enter a username and password. If this is your first time setting up the extender, use the default credentials provided in the manual.
Configuring Network Settings
Now that you’re logged into the extender’s setup page, it’s time to configure the network settings.
1. Select your home WiFi network: The setup page will scan for available networks. Once your home network appears, select it.
2. Enter your network password: Input the password for your home WiFi network. Ensure you type it correctly to avoid connection issues.
3. Adjust settings: Depending on your extender, you might have the option to rename the extended network or choose whether it operates on the 2.4GHz or 5GHz band. Choose the settings that best fit your needs.
After saving these settings, the extender will establish a connection to your home WiFi network. This process might take a few moments, so be patient.
Finalizing Installation
With the configuration complete, you can now relocate your extender to its optimal position. Remember, the best spot is usually halfway between your router and the area with weak WiFi. Once you’ve found the right spot, plug in the extender and wait for it to reconnect to the network.
To ensure everything is working correctly, test the connection strength by moving around your home and checking WiFi performance. If you notice any dead zones, try adjusting the extender’s position slightly.

Troubleshooting Common Setup Issues
Even with the best preparation, things can go awry. Here are some common issues you might face and how to resolve them.
Extender won’t connect to the router: If your extender fails to connect, try moving it closer to the router during the initial setup. Ensure that your router’s firmware is up to date, as outdated firmware can cause compatibility issues.
Weak signal after setup: If the signal is still weak after installation, consider relocating the extender closer to the router. Alternatively, check if there are any large obstructions or electronic devices that could be interfering with the signal.
Cannot access the extender’s setup page: If you can’t reach the setup page, ensure you’re connected to the extender’s network and that you’ve entered the correct web address. If the problem persists, reset the extender and try again.
Maximizing Your Extended Network’s Performance
Now that your extender is up and running, let’s talk about how to connect WiFi extender to router in a way that maximizes performance.
Optimal placement: Beyond the initial setup, experiment with different locations for your extender to find the sweet spot where the signal is strongest. Avoid placing the extender near devices that emit electromagnetic waves, like microwaves or cordless phones.
Adjusting settings: Dive into the extender’s settings via its setup page and experiment with different configurations. For instance, if your extender supports dual bands, try connecting some devices to the 5GHz band for faster speeds, especially for activities like streaming or gaming.
Regular firmware updates: Just like routers, WiFi extenders receive firmware updates that can improve performance and security. Check the manufacturer’s website periodically for updates and apply them as needed.
Limit device connections: If you notice slowdowns, it might be because too many devices are connected to the extender. Try distributing the load between your main router and the extender, connecting high-bandwidth devices directly to the router.
Conclusion
Understanding how to connect WiFi extender to router is a valuable skill in today’s digitally connected world. By following the steps outlined in this guide, you’ll be able to enhance your WiFi coverage and enjoy uninterrupted internet access across your home or office. Remember, the key to a successful connection lies in careful preparation, optimal placement, and regular maintenance of your devices. Happy surfing!
FAQs
What is the difference between a WiFi extender and a repeater?
A WiFi extender connects to your router via a wired connection and creates a new network, while a repeater wirelessly rebroadcasts your existing WiFi signal, extending the range but potentially reducing speed.
How do I know if my WiFi extender is working?
If your WiFi extender is working, you should see an improvement in signal strength and internet speed in areas that previously had poor coverage. Devices should connect to the extender’s network with minimal drops.
Can I use multiple WiFi extenders in my home?
Yes, you can use multiple WiFi extenders, but each may create its own network, potentially complicating device connectivity and reducing overall performance.
What should I do if my WiFi extender isn’t extending the range as expected?
If your WiFi extender isn’t extending the range as expected, try relocating it closer to the router, ensuring it’s not obstructed, or check for firmware updates to improve performance.


